If you have just discovered polymer clay and started looking at tool sets online, the sheer number of options can feel overwhelming. The good news is that polymer clay tools for beginners do not need to be expensive or extensive. You can make professional-looking jewelry with a small, focused kit and add to it gradually as your skills develop.
Table of Contents
Use the checklist below as a quick reference, then scroll down for the full explanation of each tool and why it matters.
Must Have Polymer Clay Tools for Beginners
Polymer Clay Tools for Beginners Checklist
Must Have
Nice to Have
Skip for Now
Acrylic roller.
This is your most important tool after the clay itself. A smooth, dedicated acrylic roller gives you even, consistent slabs every time. Avoid using a regular rolling pin from the kitchen. Wooden rollers can leave texture on the clay surface and are difficult to clean properly between colours. A dedicated acrylic roller costs very little and lasts indefinitely.
Ceramic tile or glass work surface.
An unglazed ceramic tile or a sheet of glass is the ideal work surface for polymer clay tools for beginners. Both are non-porous which means the clay does not stick and does not pick up texture from the surface. They also double as your baking surface, which means less handling of fragile pieces before they go in the oven.
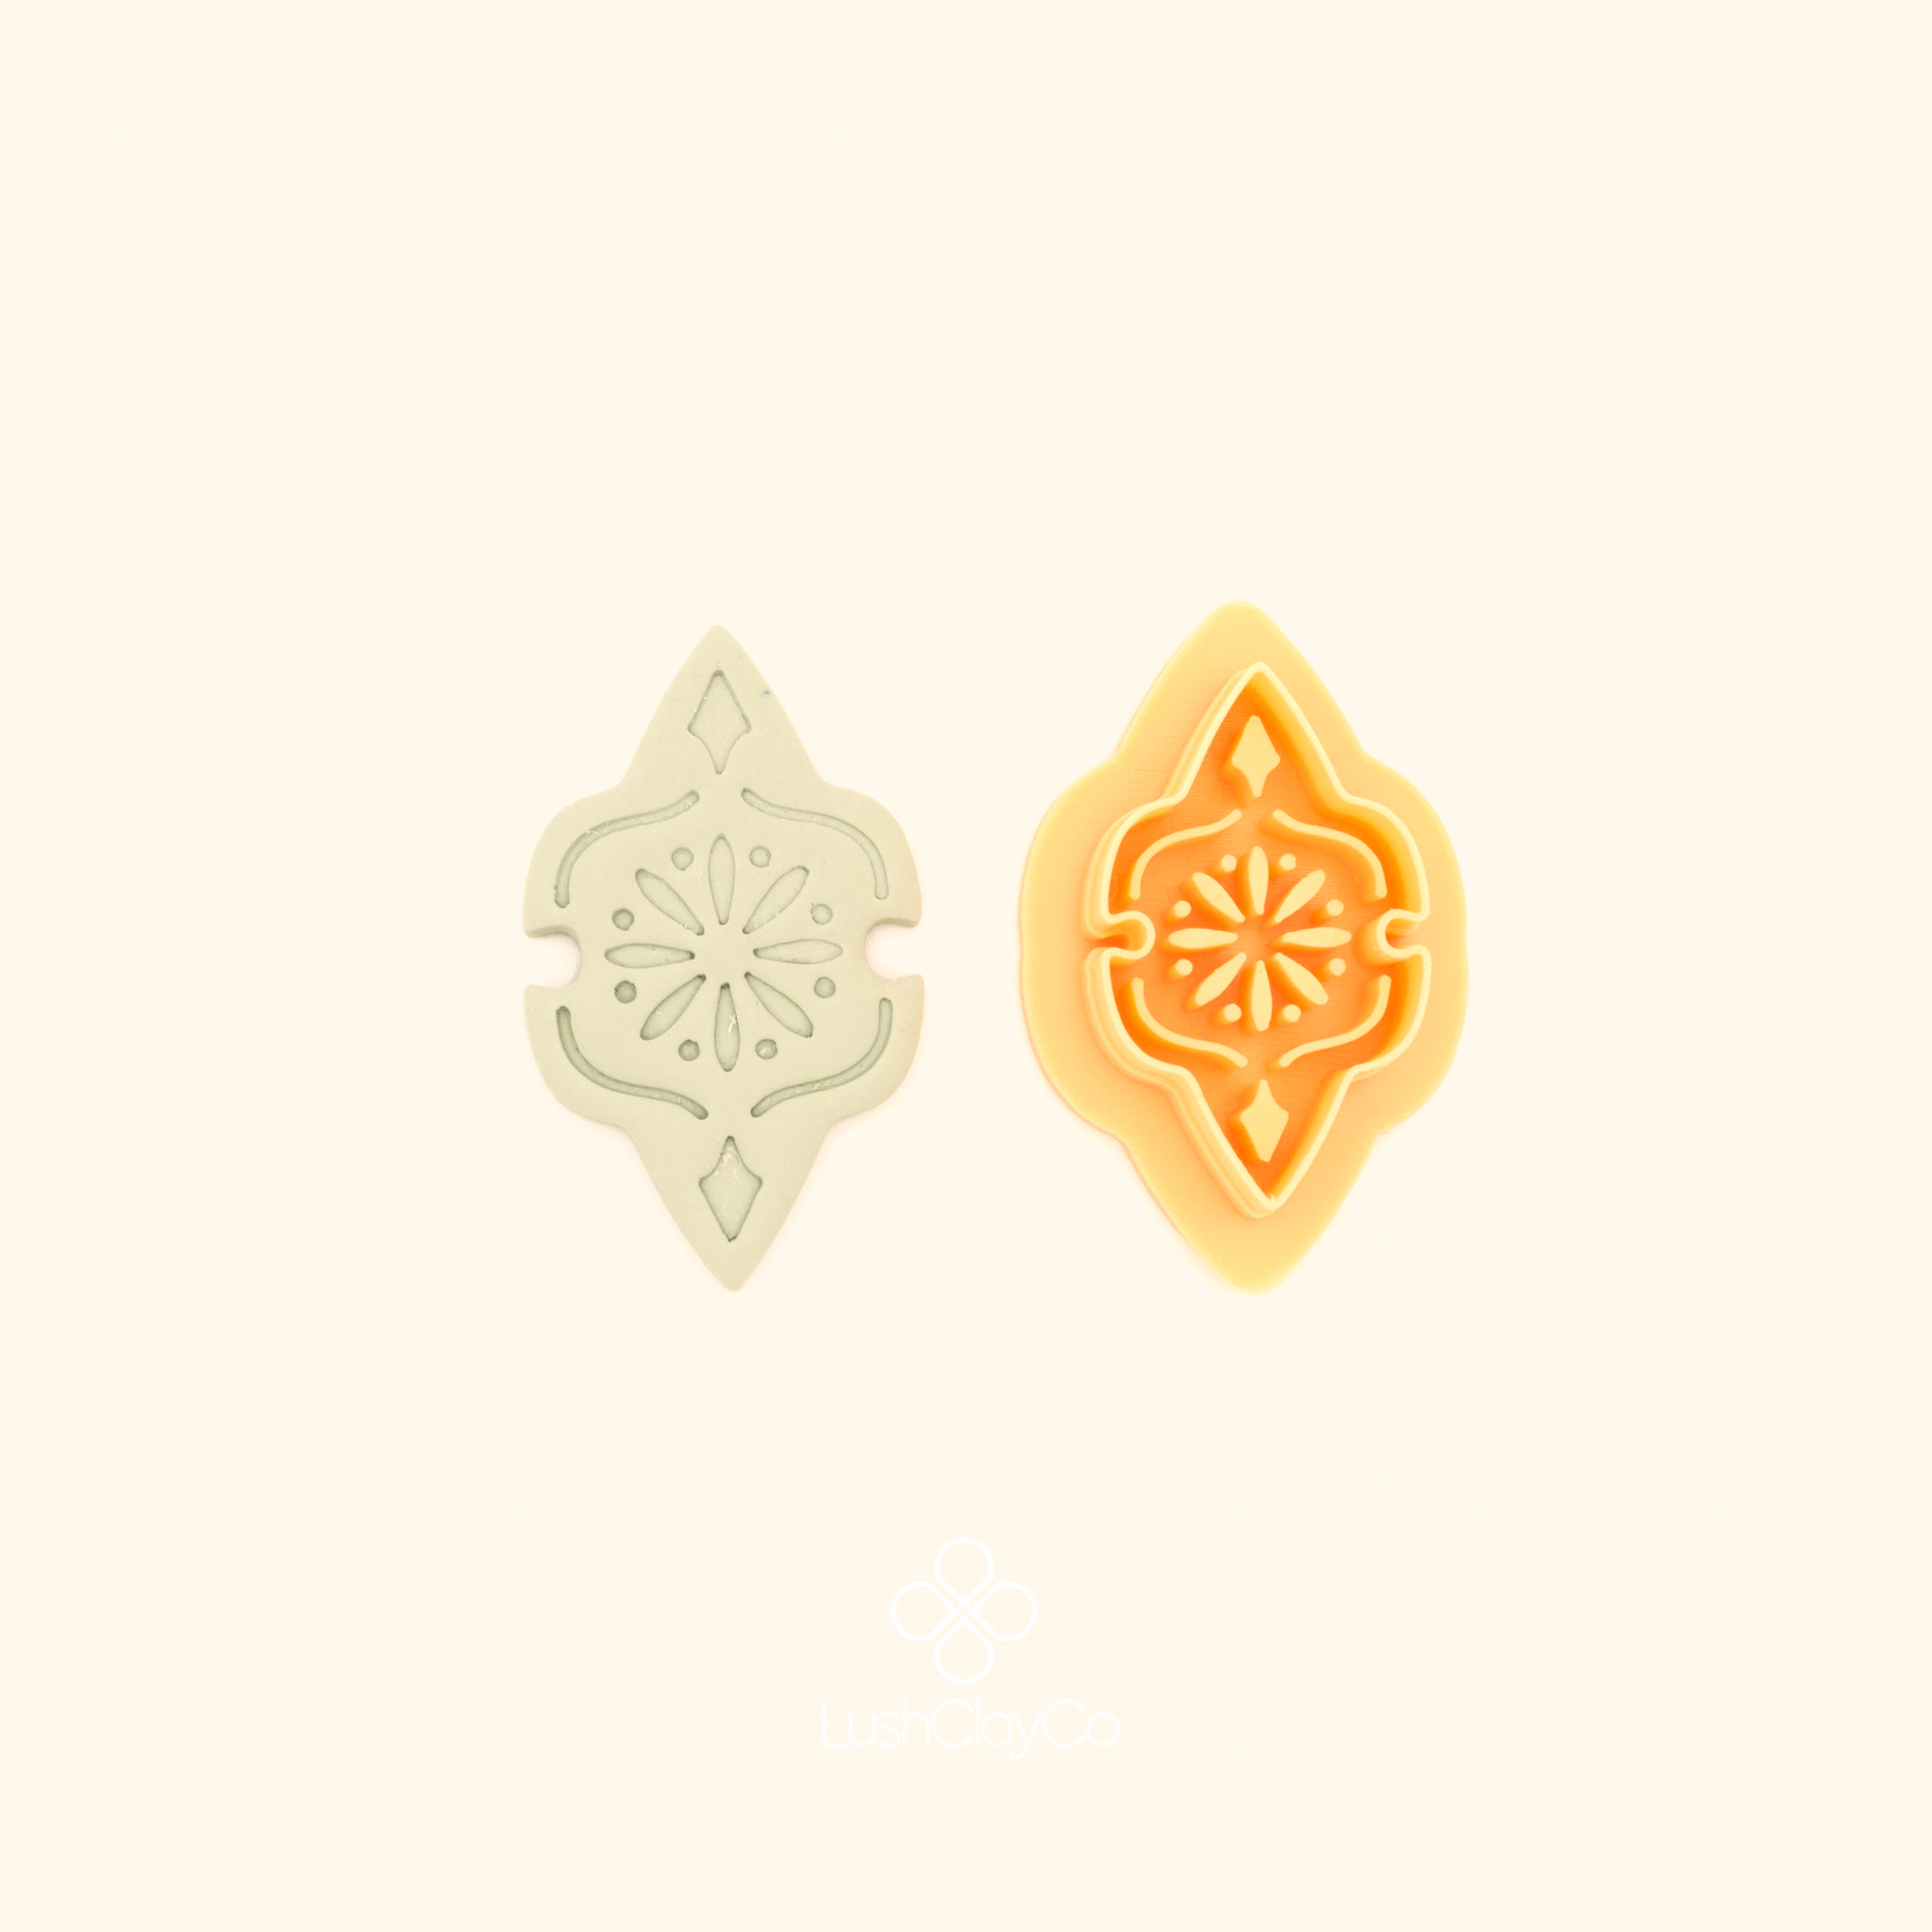
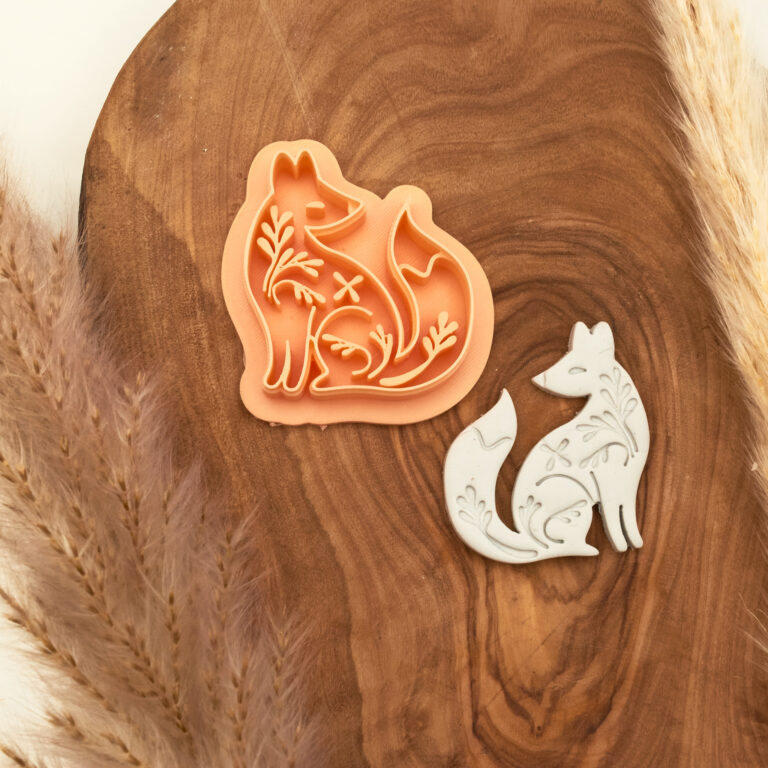
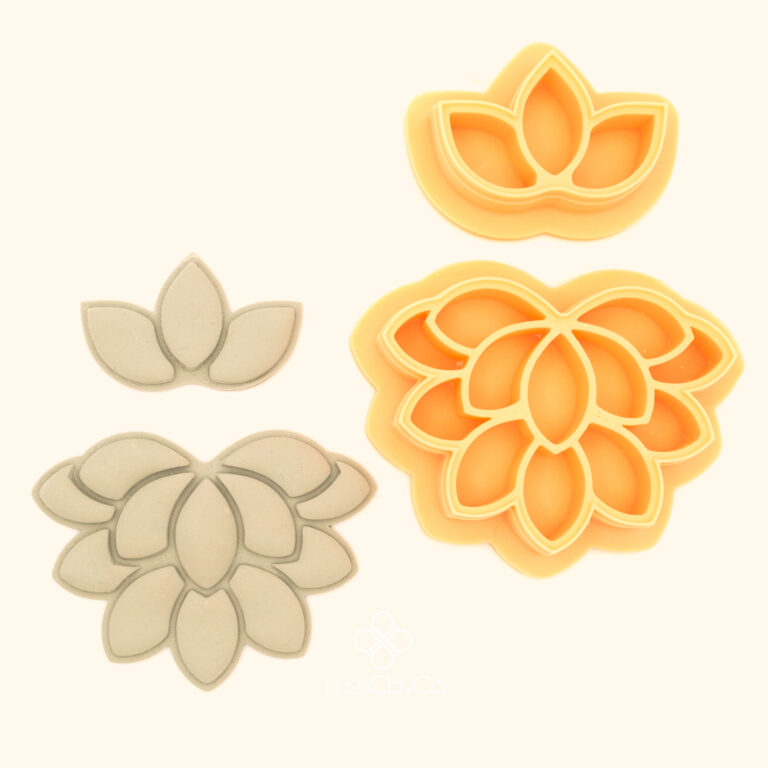
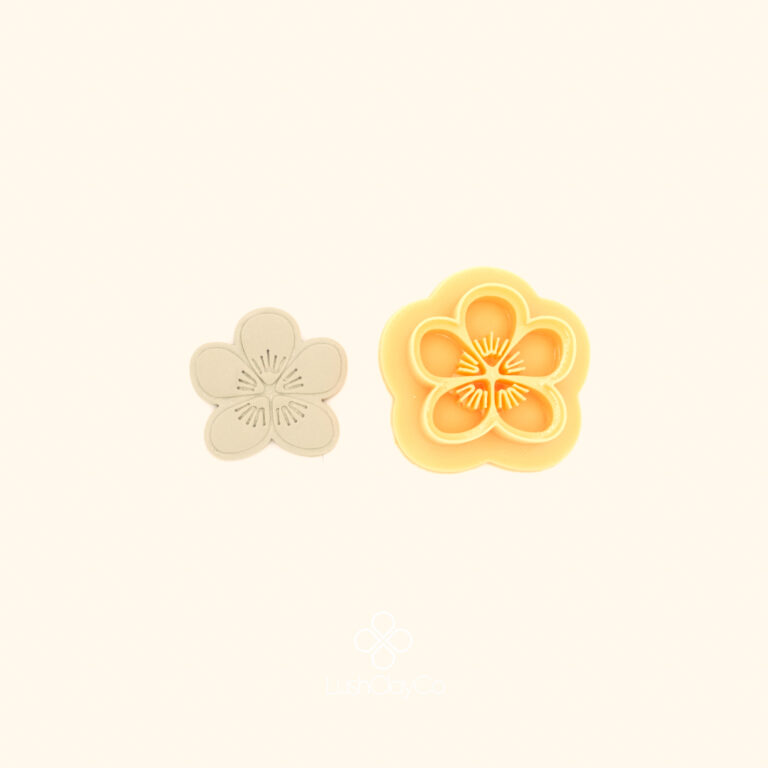
Sharp polymer clay cutters.
This is where most beginners either get it right or waste money on tools that frustrate them. Cheap, thick-walled cutters drag through clay rather than slicing it, producing ragged edges that require sanding. A sharp cutter with a 0.35mm cutting edge makes an immediate and noticeable difference to the quality of your finished pieces. The Telkari Frame is a good example of a cutter designed specifically for clean, precise results in polymer clay jewelry. Browse the full shop to see the complete range of polymer clay tools for beginners and beyond.
Standalone oven thermometer.
Most home ovens run 10 to 20 degrees hotter or cooler than their dials indicate. Inaccurate baking temperature is the number one cause of brittle pieces that snap during assembly. A thermometer costs very little and is one of the most valuable polymer clay tools for beginners you can own.
Polymer clay blade.
A dedicated polymer clay blade is essential for trimming excess clay, cutting straight lines, and general cleanup work around your pieces. It is thicker and sturdier than a tissue blade, which makes it safer and more practical for everyday use. Replace it regularly as a dull blade drags through clay rather than cutting cleanly.
Baby wipes or a damp cloth.
For cleaning your hands between colours and wiping your work surface. Clay transfers colour easily and keeping your hands and surface clean between pieces makes a significant difference to the finished result. Unscented baby wipes are ideal as they are gentle enough not to leave residue on the clay.
Cornstarch.
A light dusting on your clay slab or cutter prevents sticking without leaving any residue on the finished piece. Keep a small jar of cornstarch at your workstation and use a clean paintbrush to apply it evenly and sweep away any excess after each cut.
Clean paintbrush.
A dedicated dry paintbrush for sweeping cornstarch off your clay after dusting your cutter is one of those small polymer clay tools for beginners that makes a big practical difference. A soft flat brush works best. Keep it dry and dedicated to clay use only.
Cotton swabs and 100% acetone.
Before any piece goes in the oven, a gentle wipe with a cotton swab dipped in 100% acetone removes fingerprints and surface marks at the clay stage. This is far faster than sanding after baking and produces noticeably cleaner results. Make sure it is 100% acetone and not regular nail polish remover which contains added ingredients that can leave residue.